Homeschool moms can be easily sucked right into the vortex of homeschool scheduling, never to be heard from again! But seriously, setting up homeschool schedules can take way too much time and effort. If this sounds all too familiar, then see why Trello makes it easy and efficient, even if you’re not techie.
Plus – be sure to grab the updated Trello Cheatsheet in this post!
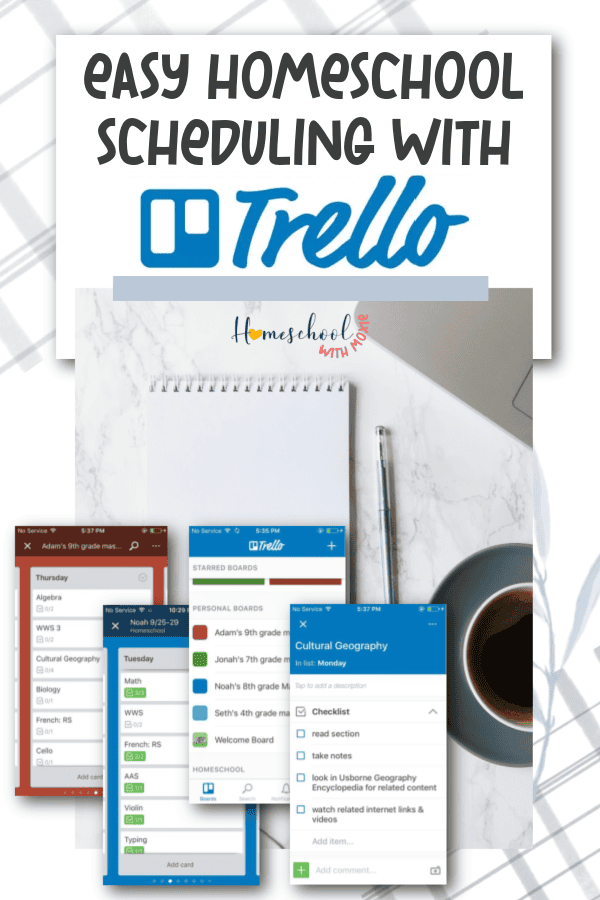
So, what exactly is Trello anyway?
Trello is a free online site (and app) which acts as a list and task organizer. I consider it like a whole desktop of sticky notes without the paper clutter.
You have the ability to manage, manipulate, reschedule, and basically make your lists work for you instead of feeling burdened by a rigid system.
You can have it on the family computer, and every child can access it via that device. Or you can access it on kindles or smart phones.
If you really don’t like the idea of your kids finding their daily tasks online, then you could still plan the year with Trello, but print their weekly Trello boards onto paper, and have them check off the tasks on a physical list.
How much time does Trello take to set up homeschool schedules?
Even if you’re a paper planner kind of girl (I am!), you can still make use of Trello for homeschool schedules, especially for your kids.
If you still have littles (like under 4th grade), I recommend workboxes for a great visual flow throughout the school day.
But if you have kids in 5th grade or above, and especially high school, then you really need to harness the magic of Trello for homeschool schedules!
It takes about 30 minutes for me to set up 4 Trello master boards for our school year. Each child in 5th grade and above gets a board on Trello.
Then, it takes me 5 minutes max every Friday to copy boards for the next week.
My teens know exactly what’s expected from them, and I can keep track of their progress.
When they check off everything for the day, they know they’re done!
What problems does Trello solve?
Have you ever written out a homeschool plan, only to have interruptions to your plan and find yourself needing to erase it all and start over? Or having to move today’s tasks back a day or two because the kids got sick?
Yes, these kinds of things can be frustrating if you’re using a rigid schedule and homeschool plan.
But with Trello, you can easily move assignments around and keep your planning as flexible as it needs to be.
Here are some other benefits of Trello:
- flexible
- customizable
- free
- online (no paper clutter)
- keeps teens accountable
- easy to use
- easy to keep up with weekly
How to Plan Your Homeschool Year On Trello (in less than an hour!)
When I see posts about how to plan your homeschool year and they involve several weeks of time or massive teacher plan books or huge crates of folders, I say to myself, “There’s a better way!” If complicated homeschool planning makes you question whether or not you’re up to this homeschool gig, then consider the simple approach. Once and done.
You can plan your whole year in an afternoon, even if you have multiple kids. The best tool I’ve found for helping me and the kids all stay organized and on task is Trello. Let me show you how it’s done.
Planning 101
But first, in order to organize your whole homeschool year in Trello, you will have to do some preliminary planning on paper. You’ll need to have a general idea of the homeschool style that fits you and your kids the best. You will also want to narrow in on some curriculum choices. >>Click here to sign up for our newsletter and download the Homeschool Styles & Curriculum Guide from our FREE resource library<<
Trello 101
If you’re a visual person and would rather see tutorial videos about this process, keep scrolling down this post! If you want to read about the process, then this is for you.
Open a FREE Account
One of the reasons I love Trello is because it is absolutely FREE. You can do everything you need to do on Trello to plan and organize your homeschool year and never pay a dime.
Create a Master Board for each Child
For each child, you will create a Master Board that includes every subject they need to work on each week.
The Master Board will detail daily or weekly subjects. But once this master board is set up, each week only requires that you spend about 10 minutes or less copying each board and adding any specific details for that week. Daily decision fatigue is gone! Hallelujah.
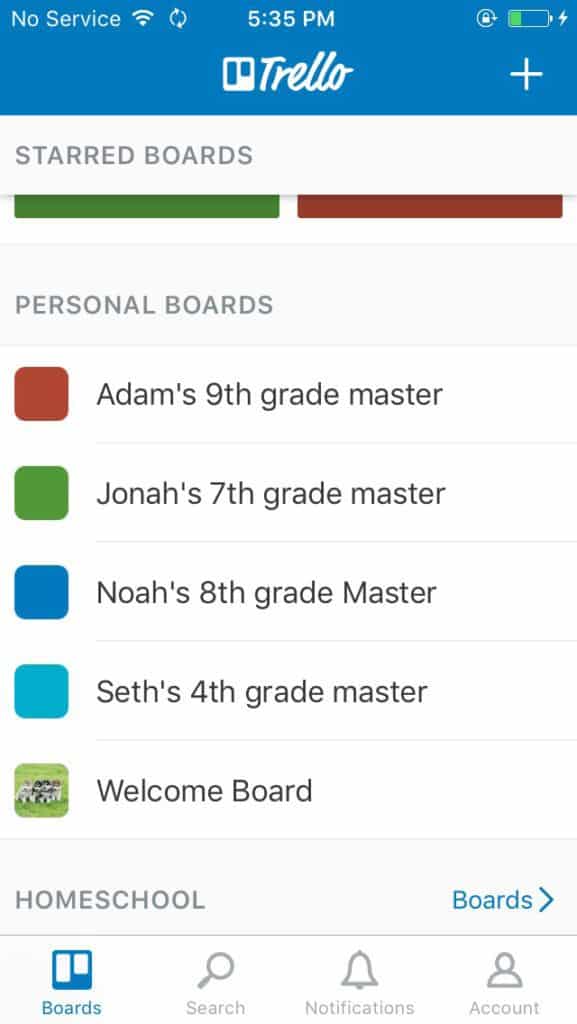
Imagine this master board as a large table. On this table, you will take 3×5 cards and write one subject per card. You will line up the cards by day of the week, stacking the cards so they resemble a bar graph. This is essentially how your “cards” (subjects) on trello are listed out on each kid’s master board.
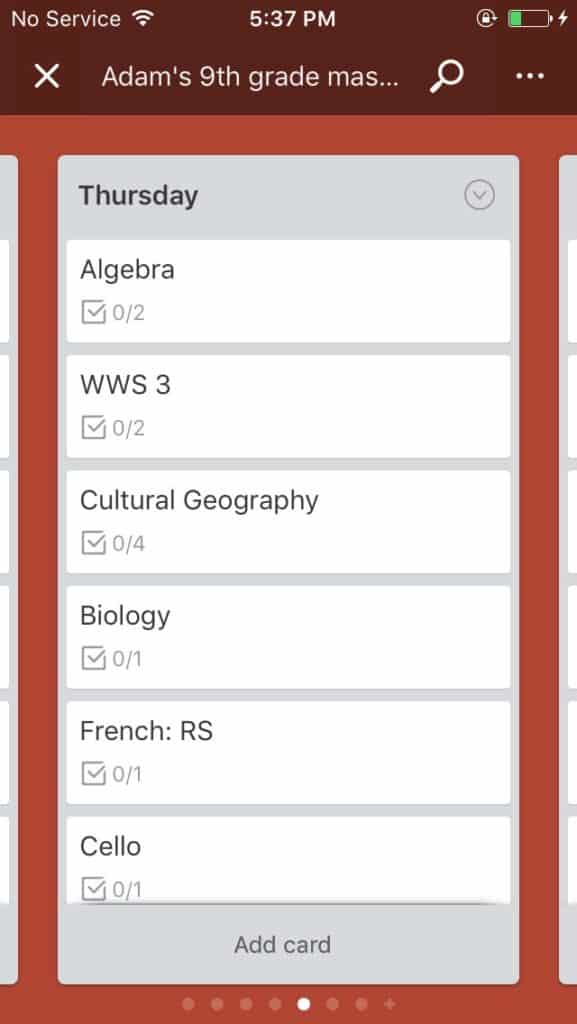
This part takes the most amount of time to set up, but once you’re done, you’re all set for the whole year! Once and done.
Create Weekly and Daily Task Cards
Inside the Master Board, you will create task cards, some assigned “weekly,” which means your kids (or you) can assign them to particular days to fit your schedule. You will want some task cards to show up daily, like math. Weekly categories are great for catching those assignments that you want your kids to cover, but you might not necessarily have time to fit it in each day.
Do you want them to practice typing? Practice states & capitals? How about a reading comprehension assignment? These are all great candidates for the weekly list. If you want them to complete an artist study twice each week, then create two cards for this under your weekly heading. Then your child can drag and drop to the specific day they will complete the assignment.
Another benefit of using Trello to plan your year is that you’re never behind! If you have an unexpected appointment on Tuesday, you won’t have to scribble everything out in your big teacher planner (because you shouldn’t need to have one anyway!). Instead, just drag and drop tasks from Tuesday onto other days if you need to reschedule. Truth bomb: Don’t let your schedule control you.
Copy the Master Board each week
Once you’ve created a Master Board for each child, 99% of your homeschool planning is done for the entire year!
Here’s all you have to do weekly to stay organized with Trello:
- Copy the master board and rename it with your child’s name and the date (Suzie 9/5-9).
- Now you have an exact duplicate of the master board. Your master board still exists, but now you can add week-specific pages and checklists to their copied board at this point.
- Your child will check off assignments as he does them during the school week. He will always know what needs to be done daily and weekly, because it is all straightforward and organized on his personal Trello board for the week. At any point, you can log in and check on his progress. Your children won’t need to ask you what to work on next. The answer is “Look on your Trello board.”
- On Friday, or whenever your school week is done, close out the weekly board (Suzie 9/5-9). It will archive it, which means you won’t have to see it cluttering up your Trello home page, but if you need to access it again to verify some content on the board, you can still find it.
- Copy the master board again and rename it for the coming week.
- Enjoy your weekend – no homeschool planning needed!
How Students Use Trello
Each student has his own board dated for that week. Assignments & details can be listed out. Checklists can be added, specifically to each subject. You can get very specific with detailed page numbers for each subject, or you can be more general (do the next thing) which is how I like to homeschool.
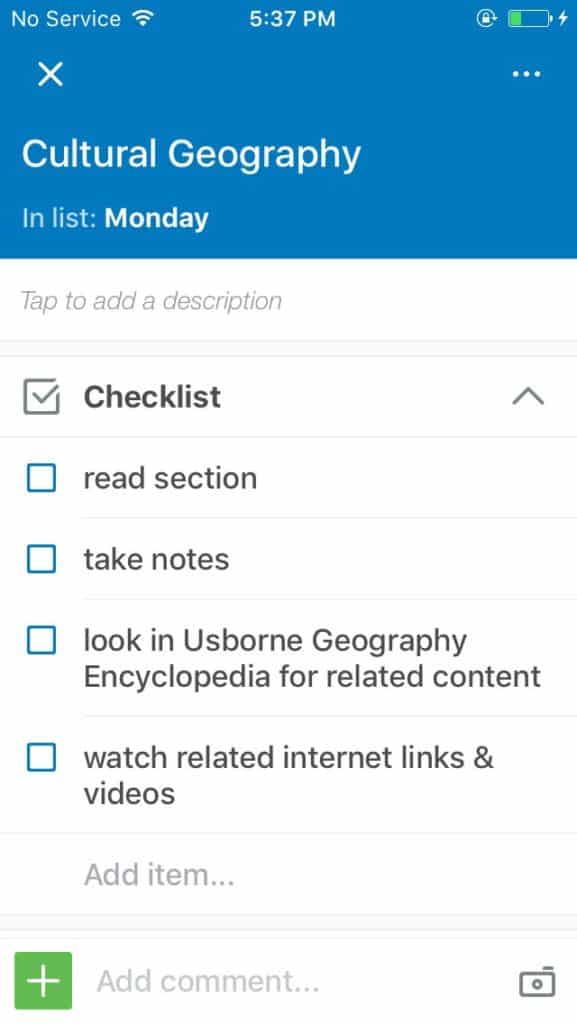
If you add checklists, they will check off parts of assignments as they are completed. The app will show a green completion bar for each card, so kids can easily see they are done with 2 out of 3 steps, and so on.
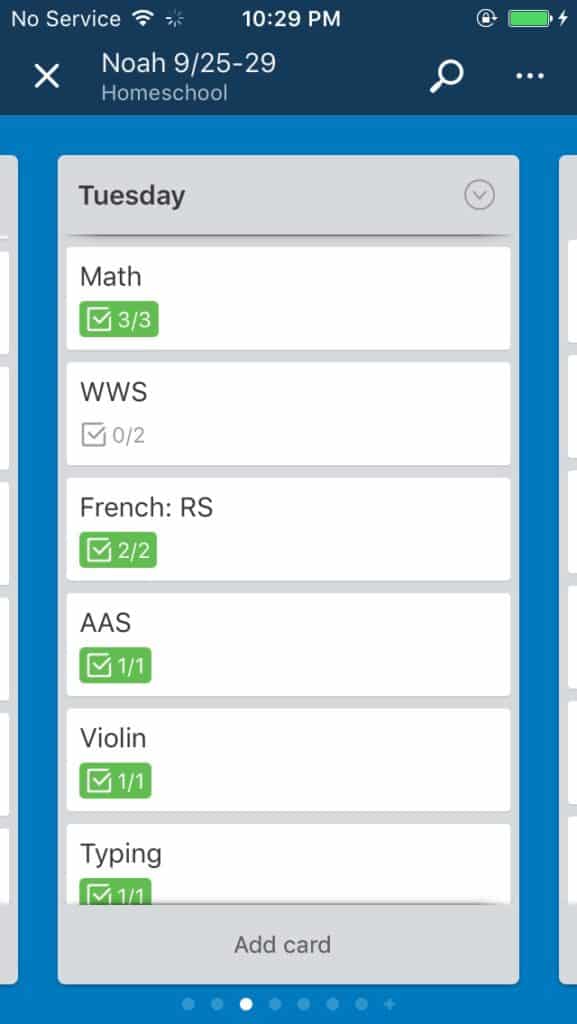
You can move cards around to accommodate changes in schedules.
Students can also leave comments for mom about certain subjects. I use this feature to have them record what pages they read in their reading assignment, since we do reading by time (45 minutes) rather than by certain number of pages.
Mom can check in at any time on her device. Before the kids have online time or TV time, I like to verify that tasks have been fully accomplished. Trello makes that much easier for me.
Kids can do the subjects in any order. I can also specify with color coding whether they need to work on a subject with mom or independently.
I take advantage of this tool to keep track of kids’ chores! We used to have a posted chore chart that could be too easily ignored. I found myself having to give way too many reminders. Now the chores are right there on trello and it’s much harder to miss.
Where can I find out more about homeschool schedules?
Trello has been an amazing tool for our homeschool for the past 5 years or more. I’ve done detailed videos and posts about how to practically get it set up, so I’ll link to those below!
Using Trello is one way that I’ve been able to manage my time well as a homeschool mom. And I think you’ll love it too.
I never thought an online planner system would work for me because they seemed too overwhelming. But Trello is user-friendly and super accessible. It’s easy to learn and easy to navigate (even for non-techie moms).
Now, you do have to initially organize on paper or at least in your mind to decide what needs accomplished for each student before you jump into Trello. So be sure to grab our FREE Homeschool Schedule Planning Pages to map out your year visually before jumping on Trello.
- Download the Trello for High School Schedules Cheatsheet <<
- How to Organize Your Homeschool Schedule on Trello
- Trello for High School Project Management
- How to Plan Your Homeschool Year on Trello
Trello Video Tutorials
>> Find the entire Time Management for Homeschool Moms series <<



Trello is a great resource. I have forgotten about it!